
How to trim an insoleUpdated 2 years ago
For a visual step-by-step guide, please check out our video here.
You'll need:
- Your new shoe insoles.
- Your old shoe insoles.
- Your shoes.
- A flat surface to work on.
- A pen or marker.
- Scissors or another cutting device.
Steps:
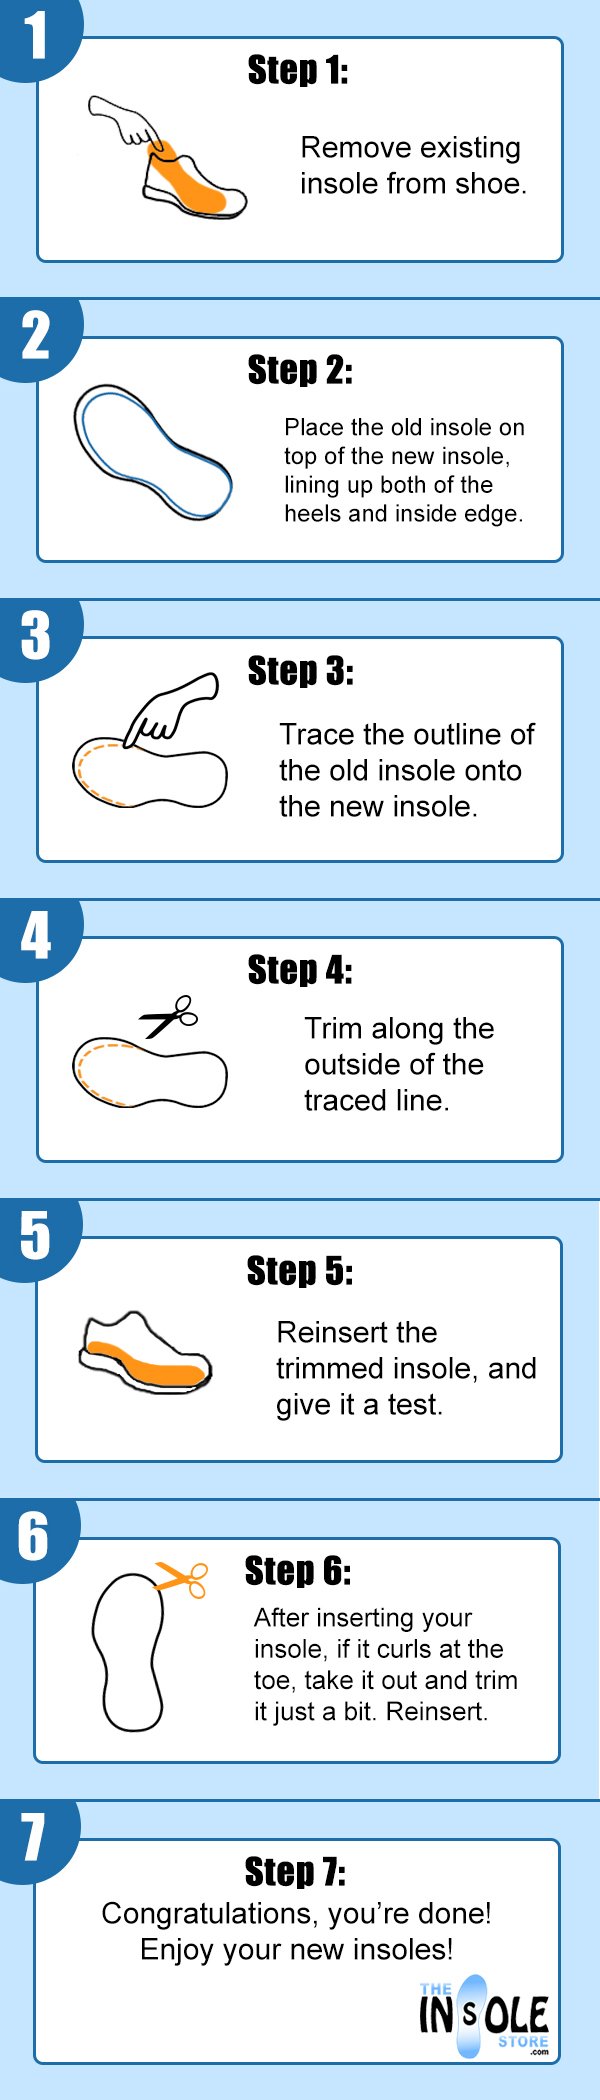
- Start by removing the existing insole from your shoe. Keep it handy, as you'll need it for the next few steps!
- Lay the new insole on a flat surface, then lay the existing insole on top of the new insole, keeping the heels aligned.
- With the heels of the insoles still aligned, carefully mark on the new insole the edge of the toe area of existing insole.
- Remove the existing insole.
- Take the new insole and cut along the line you've marked. Discard the trimmed material.
- Place the new insoles into your shoes, gently pressing down on the heel to ensure that the heel of the insole fits firmly against the bottom of the shoe.
- Feel the inside of the shoe, especially towards the toes. The insole should lay completely flat without any buckling. The insole also shouldn't have any noticeable gaps between the front of the shoe and the front of the insole.
- If the insole is buckling, remove it and trim just a little more from where it fit too snugly in your shoes, then try again; repeat if necessary. It's always better to trim too little than too much!
- Success! Once your insole lays completely flat inside your shoes, you're ready to go!
Note: Many full-length insoles are "trim to fit," but not all of them are. Any full-length insole with stitching around the outer edge of the insole should not be trimmed. 3/4-length insoles should never be trimmed.
Was this article helpful?
Yes
No